Pages

Friday, April 25, 2014

Cheap, Easy DIY Greenhouses for Seed Starting

I want to share the easy system I've used to start most of my seeds the past two years, plus a new one I invented out of necessity this year.  Bonus: you probably have most of these materials in your house already!

At home improvement and big box stores everywhere the springtime brings out the little greenhouse seed starting kits.  I've purchased quite a few.  But I kept having the same experience with peat pellets and the long, thin plastic trays.  The pellets are too small.  The plants don't thrive.  They dry out really quickly once you move them into the sunshine outside.  You have to transplant them quickly once they reach a larger size.  They get root bound.  And the plastic trays are really hard to move because the middle sags from the heavy, water-logged peat.  I hated moving them outside every day to get some sunshine, then back in every evening when it was still too cold over night.

So I came up with two DIY greenhouse solutions that suited all my needs (and the plants') better.   Follow along and I'll show you how to work with both.

All you need are:

Your seeds

Potting soil/seed starting mix/a homemade mix

A pack of plastic party cups

A medium to large plastic bin (a storage bin)

Plastic wrap

Scissors

A thumb tack

For about $2.50 I got a pack of 55 plastic cups.  You could also use peat pots, I suggest the 3-4" kind.

Use the thumb tack to poke a few holes in the bottom of the cup (don't use the tip of a steak knife, tried it, ouch)

Fill about half way with potting soil, dampen, and plant seed according to package directions.

Put the cup inside another cup.  Now you have a self-contained system.  The second cup will catch the water drainage from the cup containing the plant and soil. 

My Scarlet Flax seedlings already well started


Now at this point there are two ways to proceed.  At first, I wanted to have each cup sitting out individually on a window sill in the house where we are staying (while we wait to move into our new home) because it was still too cold to have them outside and that was the only sunny spot I had to work with.  So I needed a way to have all my plants single file, but still covered in a way that would function as a greenhouse.

So METHOD ONE:

I got out another cup. 

Cut off the widest part (the mouth) around the cup.

Cut a slit or two in the bottom (which will become the top, stay with me)


Then flip that upside down into a perfectly sized greenhouse cap with ventilation slits for your seedlings.

Viola!

Now I could move around the individual plants, put them outside on nice days, but easily bring them back in when it got chilly and line them up by the window to catch every ray of sun.  The plants can grow nice deep roots and grow some good leaves before they will need to be moved.

Then I found a plastic storage bin sitting in the garage and was able to consolidate all my little cups for easy moving and extra heat trapping.  

METHOD TWO:

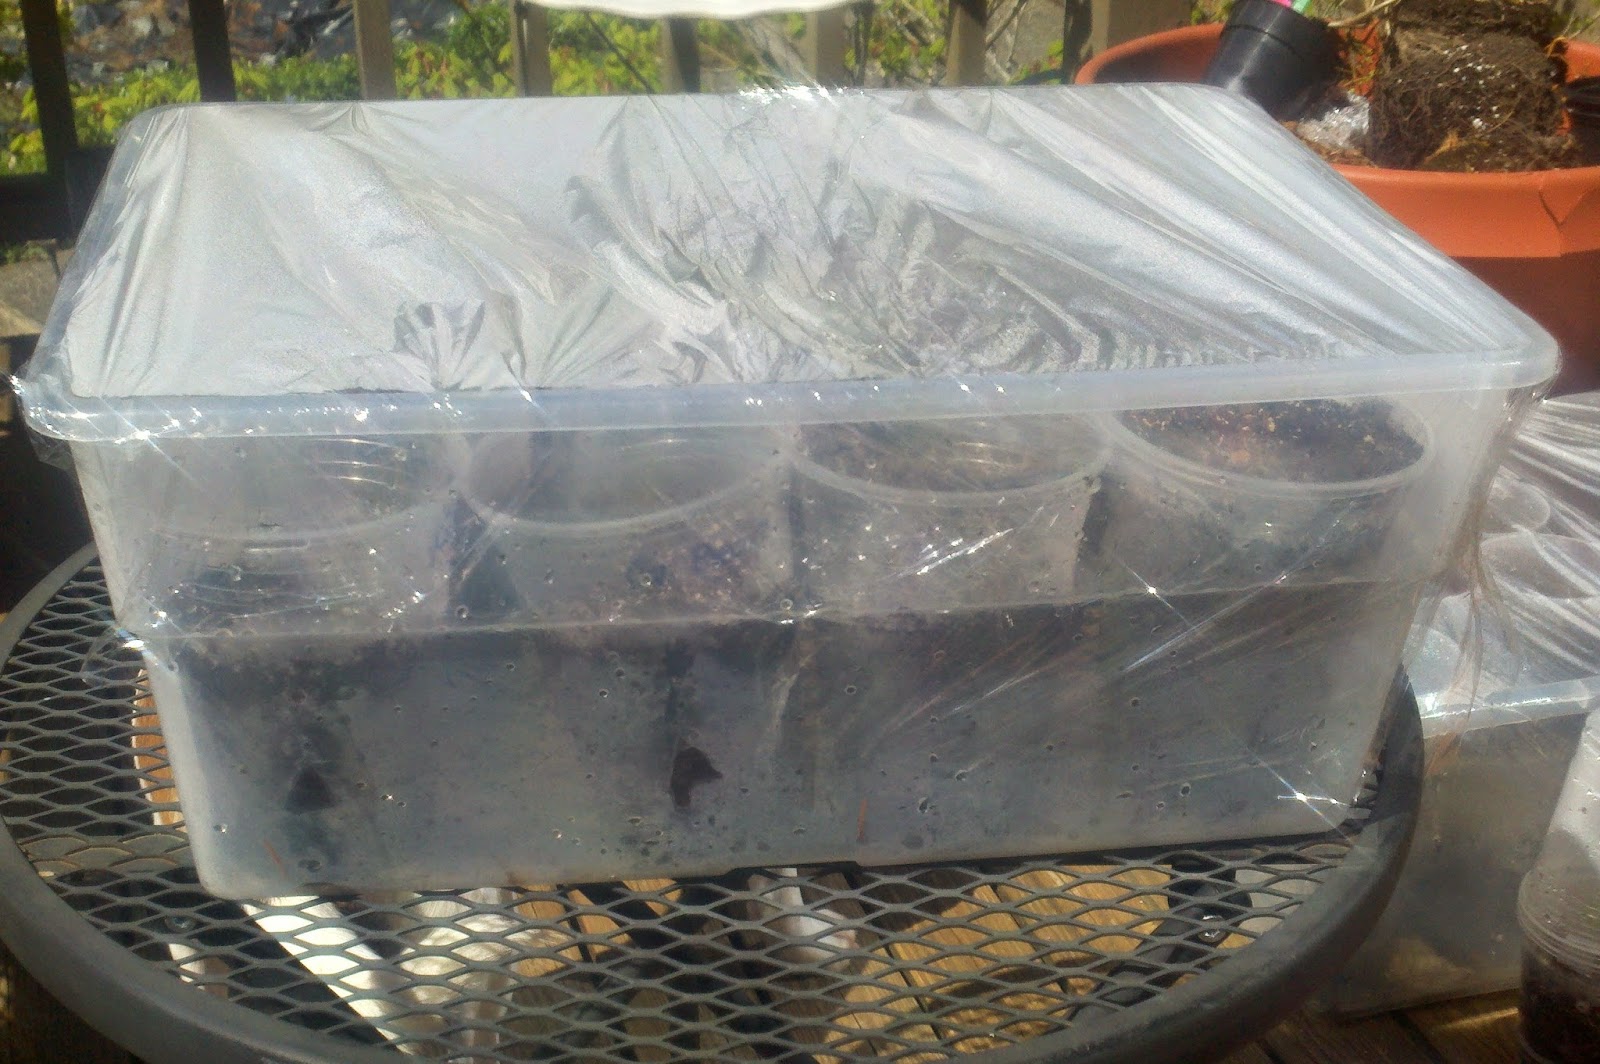
Put all your cups (or peat pots, or plastic pots) into the plastic bin.  Mine nestled in nicely. 


Cover with plastic wrap.  You now have an easily portable, sturdy, greenhouse with plenty of leg and head room for your growing seedlings!


Before your seedlings emerge you can leave the plastic wrap on tightly.  Once they start popping their green leaves out of the soil open up a few little slits for them to ventilate.  On a sunny day, if lots of condensation is gathering on the plastic, uncover half or more.  You can always "tuck them in" again for the evening or carry them right inside. 


 Would this DIY method work for hundreds of seedlings?  I did, in fact, start hundreds of seedling in a similar way in Kentucky last year!  I used long storage bins that were designed to go under beds and peat pot strips, which left no space unused between pots.

But using plastic cups and smaller bins is a great and practical method for someone starting one or two dozen plants.

Making the self-contained, individual greenhouses would be a great project for someone in an apartment with only a windowsill on which to grow, or for children to have their own special plants to grow and care for. 

Some of you may be thinking, "That is SO much plastic!"  It is a lot of plastic.  But excluding the plastic wrap - it is all reusable.  If you are gentle with your cups, wash them, and dry them once you have transplanted your seedlings, you can use them for a few years.  And even after that you can put them in the recycling bin.

Happy planting!  

Thursday, April 24, 2014

How to Store Fresh Herbs So They Last Longer

Whether you purchased your herbs from a farmer's market or grocery store or picked them yourself from your kitchen garden, it's important to know how to keep them fresh.  Even though I can pick herbs from right outside my back door, I still like to be able to pick some in the morning and have them perfectly fresh and vibrant that evening.  And then what about those times that I pick herbs intending to use them that night, but then the whole weekend goes by before I make that recipe?  If you're not fortunate enough to have an herb garden, it's even more critical to keep your purchase fresh so you can use the herbs when you need them. 

With this easy trick, herbs can stay fresh in your fridge for up to two weeks (really!).


 1) Get a Mason jar or other heavy jar or glass.  A plastic cup is more likely to tip over.

2) Add several inches of water.

3) Get your fresh herbs and sort through them.  Often one of more stem will be damaged - brusied, squashed - or some leaves will be mottled by bugs or wilted for some reason.  Go ahead and get rid of those parts.

4) Put your herbs in the jar or glass just like a bouquet of flowers.

5) Cover the jar with a large enough plastic baggie or plastic wrap to allow the herbs to stand upright without being too squashed.  There should be room for some air circulation.

6) Store in the refrigerator for the longest life

7) Change the water if you notice discoloration

8) Use the herbs as needed!

Easy, huh?   

Enjoy cooking with your fresh herbs!

Livestock for Small Spaces - Coturnix Quail


When we lived in Kentucky our house was in the suburbs on 1/4 acre.  We chose the house mainly for the lot!  It was large for the area and backed up to a tree line.  It was a little bit of privacy in the otherwise fairly barren and exposed cookie cutter suburban development.

We had an HOA which did next to nothing (except charge us money and plant flowers at the neighborhood entrance), but said that we could not have poultry on our property.  I was adamant about raising my own birds for eggs since I had long ago given up eating factory-farmed animal products.  I simply hadn't eaten eggs in years!  So I found a way around the rule:  quail.    Technically not "poultry," quail are classified as "game birds."  They are small, quiet, attractive, and not as messy as larger birds.  Needing only about 1 sq ft per bird, you can easily keep a small flock in your backyard.  Coturnix quail are the type usually used for eggs and for meat.  They are about the size of a large robin and lay amazingly large eggs given their body size.


Need another reason to raise quail (even if you can have chickens?).  Quail are excellent feed converters!   Chickens need roughly 3 pounds of food to lay 1 pound of eggs (a 3:1 feed conversion ratio) while Coturnix quail need only 2lbs of food per 1 lb eggs (2:1).  These little birds are a must-have for the urban or suburban homesteader who is ready to take on the responsibility and work of small livestock!


We got 10 female quail from a local urban farmer and kept them in a pen which was comprised of a coop and a run open to the grass.  In all, the set up was about 12 sq ft.

Inside the run. The birds loved exploring the tall grass.
     In the beginning I cleaned out the coop every few days and moved the entire set up every day.  But I quickly learned that with 10 birds, even once a day was not enough.  I also learned that quail dig.  Nice little round bird-sized holes. Perfect for twisting your ankle in.

So after a few months of time on grass, just as fall was setting in, we transitioned to a permanent location in between the strawberry patch and vegetable garden.  I started using a "deep litter" method, where fresh straw is layered in every day or as often as needed, while the previous days straw is left underneath.  This is a perfect solution for winter  The deep layer of straw with composting manure generates heat and keeps the birds warm, while the top layer is always clean for nestling down and laying eggs.  We did this in the run as well, since the grass was gone after a few days of a permanent location.

We are looking into getting quail for the new homestead soon.  We may start with chicks this time (we bought 4 week old birds last year) in a brooder, perhaps in the garage.

I'm thinking about building a permanent aviary instead of a tractor type run.  Both set ups have their advantages and disadvantages.  The coop/tractor gives them access to fresh grass.  But it can be very hard to move without injuring a bird (as I learned) or yourself (if you have a back back and knees like I do).  It also exposes all your grass to digging and copious amounts of bird poop - which will fertilize your grass, but also kill some of it, unless you want to move it twice a day.  Depending on how much space you have and what else you use your yard for, this may be a great option.  But in Kentucky we found that we were creating chaos in our relatively small yard and making it difficult for the kids to play.  Not to mention our hound-mix dog, Hudson, loved to roll in the really stinky grass after we moved the pen - yuck!!  

A permanent aviary could afford the birds even more space (since I wouldn't have to move it), and provide branches for hiding and perching and stimulation. It could be tall enough to clean out without bending over.  As long as the birds are constantly given greens, grass, weeds, and kitchen scraps (I found that mine especially loved cantaloupe rinds, pecking out every last bit of fruit) in addition to their pelleted food their diet should not suffer because they are not actually on grass.  The soiled straw could be composted immediately after being taken out with a pitchfork on a regular basis, or could be left in per the deep litter method and removed for the garden several times a year.  

I'll share some more lessons we learned from our first flock of quail and an update on a new flock later! 

In quail keeping as in all things,

Soli deo gloria
Lauren

The Beginning of a Homestead

How we got here...


I started looking at real estate online months before we moved to Bellingham, Washington.  I started looking as soon as Nate even thought about applying for the new job!  I guess I am just a perennial homemaker – always thinking, dreaming, planning, and learning about how I could turn a property into a home - my home.  I looked at little houses, big houses, old houses, new houses.  Some out in the country, some right downtown. 

If you’re like me, and your heart is in the country while your life has to be in the city or suburbs, looking at houses can be a heart ache.  I came across BEAUTIFUL turn-of-the-century farmhouses on several acres.  White porches, red barns, four-board fencing… an hour away from town.... and $50K over budget.  And I saw houses right outside town in the suburbs.  Newly built, granite counter tops, walk in closets, luxurious master bathrooms, beautiful backsplashes... and not a single feature that inspired me to actually go look at them.  They sat on teeny tiny lots with the compulsory ornamental tree and a few boxwoods in the front and a perfect square of lawn hedged in by four or five neighbors’ houses in the back.   Stifling.  

I tried to like them.  I really did.  I thought, “Well, maybe this one since there is a park down the street.”  Or “Maybe I’ll like being inside this house so much I won’t mind what is outside.”  Some of the kitchens were tempting.  I have always wanted a big kitchen.  A HUGE kitchen.  Somewhere to roll out pie and pizza doughs, to make breads from scratch, and host large gatherings.  Space to roast my Thanksgiving turkey and still have the pumpkin pie finishing, with green beans, glazed carrots, and stuffing on the range. 

But, as I tried to imagine living in one of these cookie-cutter American dream homes on a little manicured lot in suburbia I realized that all the appeal of these “chefs kitchens” with granite and double ovens and stainless steel was completely lost on me without the property to grow my own food and the space to live and play outside.  

A kitchen counter is a place to spread out the bounty of the morning’s harvest from your garden.  A stove top is where you splatter homegrown tomato sauce and fill a cast iron skillet with backyard quail eggs and freshly picked veggies for an omelet.  A pantry should be full of root vegetables, freshly dug in the fall.  A fridge should be bursting with brilliant greens: chard, lettuce, arugula, green beans, cucumbers.  

Eggs from our backyard quail in Kentucky
And an HOA telling me I can't have quail or grow tomatoes in my front yard?  No Thanks!!  So we passed on all the new-build neighborhoods with reasonable prices and told our realtor “charming older home on property, near town, quirks ok.”

And we prayed!  I prayed that God would bring something onto the market where we could grow, play, dig, garden, raise animals, and explore in our own backyard.  I prayed for a place where Nate could ride his bike to work – his perpetual dream.  I prayed for a place near town so we could be involved in the community and access all the great things about our small, fun city.  I didn't think we could have location and property, but we held out hope.  

And God answered!     

We now have a 1940’s cottage-esque cape cod on .6 acres 2.5 miles from downtown and Nate’s work!  It is in an established and friendly neighborhood with all older homes on large lots – most between ½ and 1 acre.   It has all the convenience of being close to downtown and tons of shopping (i.e. there is a Starbucks 1.2 miles in every direction, four grocery stores within 1.5 miles, and the mall - not that I ever go to malls - is 1.5 miles away) but the immediate area gives you the feel of a small country town with picket fences and chickens meandering down the sidewalks.    There is a park down the street that connects to a walking trail  that takes you one mile to a public beach on Bellingham Bay!

It has its quirks as an older home.  It’s smaller than the house we had in Kentucky, even though our family will only be getting bigger.  The dining room is literally a room.  With a door.  Not attached to the kitchen.  And the kitchen is in the back of the house quite separate from everything else.  That’ll take some getting used to.  All the rooms are pretty closed off… a far cry from our newer very open floor plan home in Kentucky. There is one full bathroom, and then a little “water closet” attached to the master bedroom (which is very tiny).  Walk in closets? Not a chance.  (Actually the closet situation sort of makes me have a panic attack so we’ll talk about that later. )  But the house and property just grabbed our hearts and imaginations right away!    And I love it.  

I love the white cabinets and bay window in the kitchen!  It is separate from the rest of the house, but it does have tons of cabinet space, a big sink, and cool built-in storage.
For now, we’re trying to make this smaller, older house into a functional home for our family.  With four bedrooms, a living room, and a den we have plenty of options.  There could be two bedrooms (a master and the boys sharing one), a guest room, and/or an office, and/or a play room.  Perhaps a library/study?   It has a basement that looks like it will be easy to finish.  A homeschool room?  A home gym?  A craft room?  Storage?   I'm sure it will evolve over time.  We have the feeling that the more closed off rooms will lead to more possibilities.  It will be easier to designate space for studying, for projects, for watching tv, for playing games, and for eating, etc than if it all existed in one large room. 

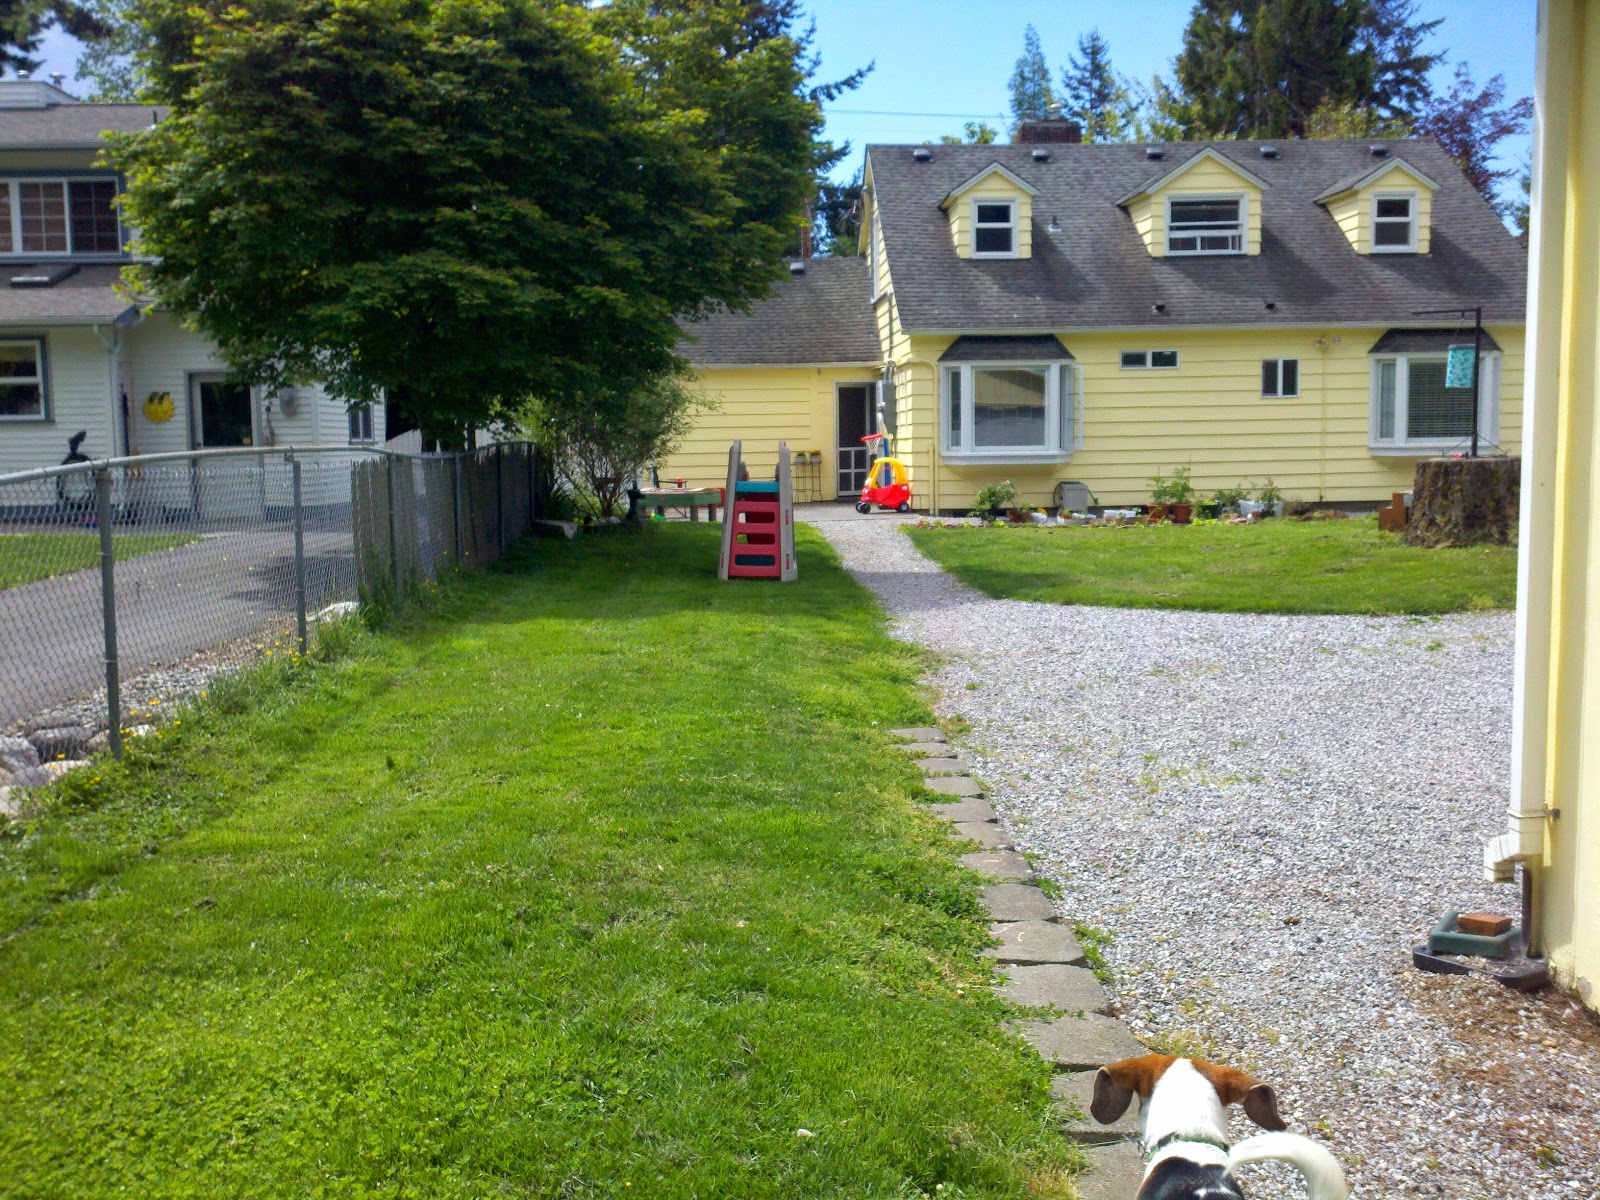
In between the house and the garage is what we call the "front backyard."  Behind the garage (shown here) is another 1/4 acre or so designated the "back backyard" lol

The yard goes way back behind the house, with plenty of room for a large vegetable garden, an herb garden, raspberries and blackberries on trellises, a strawberry bed, fruit trees, and of course a pen for quail.  My plan for next year is to get ducks.  They seem like the perfect fit for our wet weather and the constant barrage of slugs.  Eventually I’m even hoping for a dairy goat!  A huge garage sits behind the house with room for two cars and a shop.  Or a goat stall and milking parlour?  Or an indoor seedling growing area?  Or a chick brooder?  All three!?  


The "front backyard" between the garage and the house. I think from the street to the garage makes up about 1/4 acre.  From the garage back to the fenceline is a little more than 1/4 acre of grass and a few trees.  I love Hudson's ears flapping at the bottom of this picture!
The "front backyard" and the garage/shop taken from the second story window.  That odd-shaped patch of grass is destined to become 100% vegetable garden! There is too much gravel for my taste, but both our parents have or are getting RVs so it is a perfect set up for them to come stay. 

 So many possibilities!

This is the beginning of a suburban homestead.  Keep checking out the blog to follow along as I dream, design, plan, implement, mess up and try again in the home, the garden, and the farmyard!


In all things, to God be the glory
soli deo gloria
Lauren